

With every year that passes, we keep getting surprised about the growth of the cryptocurrency market, not only in terms of its market capitalization but also in popularity amongst the general population. There are only a handful of topics nowadays that get discussed more passionately by almost anyone.
As a consequence, this decade will probably be remembered, amongst other notable events, by cryptocurrency trading and crypto speculation in general. It is still in a relatively unregulated environment and having access to crypto exchange is as easy as it gets.
Currently, a non-zero percentage of the population is searching for a strategy that will allow them to quit their jobs and retire. In order to do so, they resort to various overfitting and finding patterns with a level of scientific rigor that would blush astrologists. A more reduced group of people is learning how to code, backtest, and via statistical methods find trading rules that will lead to an edge. This article is geared to this second group.
We will get familiarized with the Binance API and some of its quirks in order to later implement a live and automated trading strategy. By the end of the tutorial, we will have created an algorithm that trades multiple assets at once, checks our current position on each asset, buys or sells based on recent price changes and the MACD.
In order to not put real money at risk, we will resort to Binance’s Testnet, a secondary exchange with paper money whose sole purpose is to be used as a sandbox. Let’s get started!
Table of Contents
Setup of Testnet and installing required libraries
In order to get started, you first need to go to the Testnet Website and create your account. Unlike Binance itself, the registration does not require any sort of documentation, so it is just a 10-second process. Click on “Generate HMAC_SHA256 Key” and copy the API Key and the Secret Key.
Move to a Jupyter Notebook or create a blank python file and import the required libraries and also paste the previously obtained keys. Before doing so, fire up the terminal and make sure you have the following libraries installed in your local environment:
pip install python-binance
pip install pandas
pip install pandas_ta
from binance.client import Client
API_KEY = <YOUR_TESTNET_API_KEY>
API_SECRET = <YOUR_TESTNET_API_SECRET>
Getting to know the Binance Library for Python
Get historical data from Binance
Now that you have everything set up and running, let’s connect to the API with our credentials and fetch some fresh historical data:
api = Client(API_KEY, API_SECRET, testnet=True)
bars = api.get_historical_klines("BTCUSDT", Client.KLINE_INTERVAL_1MINUTE, start_str="2 hour ago UTC")
print(bars)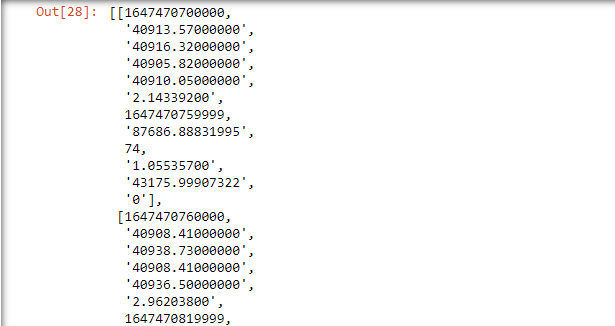
You will notice a few suboptimal things. First, the get_historical_klines uses a very inconvenient notation for specifying the start date that we want. Additionally, the output is not only given as a list of lists, but we also don’t know the column names beforehand.
You can go ahead and also change “hour” to “day”, but keep in mind that it will take some time to fetch a few days of 1-minute data. Unlike regular stock markets, cryptocurrencies are traded 24 hours a day and 7 days a week.
In the following step, we load everything into a DataFrame, correctly name the columns, change the timestamp to datetime objects, and finally set the Open Time as our index.
import pandas as pd
df = pd.DataFrame(bars)
df.columns = ["Open time", "Open", "High", "Low", "Close", "Volume", "Close import pandas as pd

# Load result into a dataframe
df = pd.DataFrame(bars)

# Set the column names
df.columns = ["Open time", "Open", "High", "Low", "Close", "Volume", "Close time", "Quote asset volume", "Number of trades", "Taker buy base asset volume", "Taker buy quote asset volume", "Ignore"]

# Convert the timestamp into datetime objects
df['Open time'] = pd.to_datetime(df['Open time'],unit='ms')

# Set the Open time as the index of our dataframe
df.set_index('Open time', inplace=True)

# Keep only the first 5 columns (Volume included)
df = df.iloc[:, :4]

print(df.head())
Get account data and create orders in Binance
Let’s start by creating an order. Remember that we are using the Testnet and that these assets are not real cryptocurrencies.
# Buy a little bit of bitcoin
order = api.order_market_buy(
    symbol='BTCUSDT',
    quantity=.001)
print(order)
Let’s see if we have orders pending to be filled:
# Get a list of orders that are pending
open_orders = api.get_open_orders(symbol='BTCUSDT')
open_orders
Most probably than not, the last call returned an empty list. This is because our first order already got filled and is thus not pending anymore. But, if we want to get the previous orders that we made, we can use the following function:
#Get a list of orders that we made previously
all_orders = api.get_all_orders(symbol='BTCUSDT')
print(all_orders)
If we want to see our current balances, we can use the get_account function. In order to format the output in a friendlier fashion, we will use the JSON library.
import json

#Get account info
acct = api.get_account()

# Show the results in a formatted way
print(json.dumps(acct, indent=4, sort_keys=True))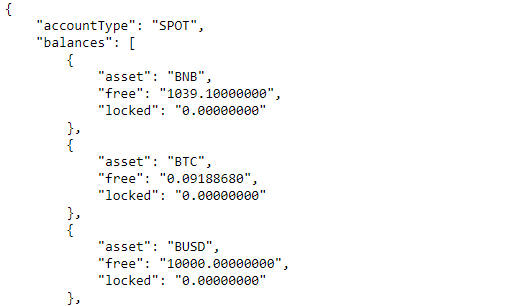
Most of the building blocks required to build our algorithmic strategy are already covered, so let’s get right to it!
Creating a trading bot in Binance
Our algorithm should not be used for trading since I did not previously do any backtest. Regardless of that, it is a very interesting script since it covers some interesting features, most notably that it trades multiple assets at once!
Since it has a few moving parts at once, we will first create a few functions and create a prototype for the one asset case. Moving to the multiasset strategy is then an easier step to do.
Our strategy will buy whenever we do not currently hold a position, and both the MACD and the 30-Minute price change are positive. Conversely, we will sell when we already hold a position and both indicators are negative.
Useful functions for the algorithm
Let’s start by creating a function that will return the MACD of the closing price. In order to see what it does, I’ll also go ahead and plot it (I loaded more hours into the dataframe in order to make the graph more interesting).
import pandas_ta as ta

# Returns a series with the moving average
import pandas_ta as ta
def get_macd(data, slow=12, fast=26,signal=9):
    macd = ta.macd(data,slow=slow,fast=fast,signal=signal)
    return macd.iloc[:,-1]

macd = get_macd(df["Close"])
macd.plot()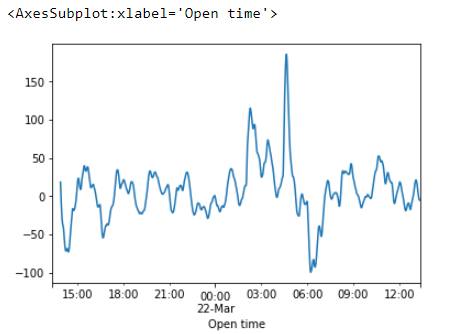
Moving on, now it’s time to add a function that will get the historical 1minute bars of a given asset. Notice the distinction I make between an asset (‘BTC’) and a symbol (‘BTCUSDT’). The function is just a wrapper of the previous script we created to fetch data.
# Get up-to-date 1 minute data from Binance and add the MACD and the price changes
def get_bars(asset='ETH'):
    # This is the same as what we covered before
    bars = api.get_historical_klines(f"{asset}USDT", Client.KLINE_INTERVAL_1MINUTE, start_str="1 hour ago UTC")
    df = pd.DataFrame(bars)
    df.columns = ["Open time", "Open", "High", "Low", "Close", "Volume", "Close time", "Quote asset volume", "Number of trades", "Taker buy base asset volume", "Taker buy quote asset volume", "Ignore"]
    df['Open time'] = pd.to_datetime(df['Open time'],unit='ms')
    df.set_index('Open time', inplace=True)
    df = df.iloc[:, :4]

    # Convert columns to numeric:
    for col in df.columns:
        df[col] = pd.to_numeric(df[col])

    # add indicators that we will be using to trade
    df['macd'] = get_macd(df["Close"])
    df['pct_change_30m'] = df['Close'].pct_change(30)
    return df

get_bars('BTC')
Prototype of the trading bot
Finally, we can create a prototype of our strategy for the 1 asset case. Notice that we do not yet place real orders, but just refrain to printing the desired behavior.
import time

ASSET = 'BTC'
is_long = True

while True:
    # GET HISTORICAL DATA
    bars = get_bars(asset=ASSET)

    # CHECK IF WE SHOULD BUY OR SELL
    should_buy = bars['macd'][-1] > 0 and bars['pct_change_30m'][-1] > 0
    should_sell = bars['macd'][-1] < 0 and bars['pct_change_30m'][-1] < 0
    print(f"Is Long: {is_long} / Should Buy: {should_buy}, / Should Sell: {should_sell}")

    if is_long == False and should_buy == True:
        # WE SHOULD BUY THE ASSET
        print(f'Symbol: {SYMBOL} / Side: BUY')

        #UPDATE STATUS OF OUR HOLDING
        is_long = True

    elif is_long == True and should_sell == True:
        # WE SHOULD SELL THE ASSET
        print(f'Symbol: {SYMBOL} / Side: SELL')

        #UPDATE STATUS OF OUR HOLDING
        is_long = False

    # PAUSE BEFORE ITERATING AGAIN
    time.sleep(10)
    print("*"*20)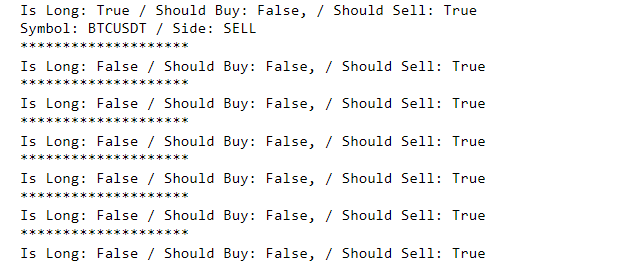
Coding the multi-asset crypto trading bot
We will use a list of dictionaries that will hold the information for all the assets that we are going to trade. The order size was set for every asset in order to be roughly equivalent to 100USDT. If you want to add other cryptocurrencies, keep in mind that the Testnet only has a reduced number of symbols available (use api.get_all_tickers() in order to list them).
assets = [
    {'asset':'BTC','is_long':False,'order_size':0.0025},
    {'asset':'LTC','is_long':False,'order_size':100},
    {'asset':'TRX','is_long':False,'order_size':1000},
    {'asset':'ETH','is_long':False,'order_size':0.03},
    {'asset':'BNB','is_long':False,'order_size':0.25},
    {'asset':'XRP','is_long':False,'order_size':100},
]
We keep track of the strategies holding in the dictionary instead of via the get_accout function in order to avoid selling holdings that we might already be holding in our portfolio.
Thanks to our previous prototype, extending the logic to a multi-asset scenario is a simple implementation.
while True:
    for index, asset in enumerate(assets):
        # Get asset parameters and data
        asset, is_long, order_size = asset['asset'], asset['is_long'], asset['order_size']
        bars = get_bars(asset=asset)

        # Check if we should buy or sell
        should_buy = bars['macd'][-1] > 0 and bars['pct_change_30m'][-1] > 0
        should_sell = bars['macd'][-1] < 0 and bars['pct_change_30m'][-1] < 0
        print(f"Asset: {asset} / Is Long: {is_long} / Should Buy: {should_buy}, / Should Sell: {should_sell}")

        if is_long == False and should_buy == True:
            print(f'We are buying {order_size} {asset}')
            order = api.order_market_buy(symbol=f'{asset}USDT', quantity=order_size)
            assets[index]['is_long'] = True

        elif is_long == True and should_sell == True:
            print(f'We are selling {order_size} {asset}')
            order = api.order_market_sell(symbol=f'{asset}USDT', quantity=order_size)
            assets[index]['is_long'] = False

    print('Iteration ended')
    print(assets)
    print("*"*20)
    time.sleep(10)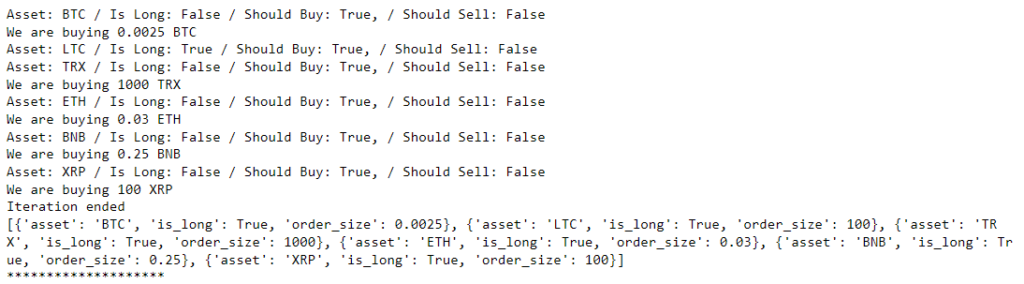
Conclusion
If you’ve reached this far, you now have a greater understanding of the logic behind the implementation of a trading algorithm. You have also learned how to avoid some common pitfalls that are not unique to Binance but to algorithmic trading itself! Having this script as a template to implement your own trading ideas is going to prove helpful on your trading journey.
As a final note, I cannot overstate the importance of really knowing the behavior and the metrics of an algorithm you created. If you decide to use real money on one of your strategies, please backtest your idea thoroughly before doing so.
No responses yet